1. 해당 프로젝트에서는 구글맵을 이용한 위치 확인, 카메라 및 사진, 모바일 기기 로컬 저장에 대해서 배워볼 것이다.
구글 폰트, uuid 다트 패키지 다운 필요
해당 강의까지의 파일 트리는 아래와 같다.
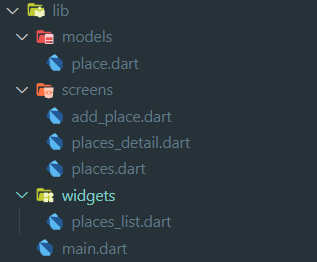
- main.dart
import 'package:favorite_places/screens/places.dart';
import 'package:flutter/material.dart';
import 'package:google_fonts/google_fonts.dart';
final colorScheme = ColorScheme.fromSeed(
brightness: Brightness.dark,
seedColor: const Color.fromARGB(255, 102, 6, 247),
background: const Color.fromARGB(255, 56, 49, 66),
);
final theme = ThemeData().copyWith(
useMaterial3: true,
scaffoldBackgroundColor: colorScheme.background,
colorScheme: colorScheme,
textTheme: GoogleFonts.ubuntuCondensedTextTheme().copyWith(
titleSmall: GoogleFonts.ubuntuCondensed(
fontWeight: FontWeight.bold,
),
titleMedium: GoogleFonts.ubuntuCondensed(
fontWeight: FontWeight.bold,
),
titleLarge: GoogleFonts.ubuntuCondensed(
fontWeight: FontWeight.bold,
),
),
);
void main() {
runApp(
const MyApp(),
);
}
class MyApp extends StatelessWidget {
const MyApp({super.key});
@override
Widget build(BuildContext context) {
return MaterialApp(
title: 'Great Places',
theme: theme,
home: const PlacesScreen(),
);
}
}
- models/place.dart
import 'package:uuid/uuid.dart';
const uuid = Uuid();
class Place {
Place({required this.title}) : id = uuid.v4();
final String id;
final String title;
}
1) id값은 uuid를 활용하여 생성
- screens/places.dart
import 'package:favorite_places/screens/add_place.dart';
import 'package:favorite_places/widgets/places_list.dart';
import 'package:flutter/material.dart';
class PlacesScreen extends StatelessWidget {
const PlacesScreen({super.key});
@override
Widget build(BuildContext context) {
return Scaffold(
appBar: AppBar(
title: const Text('Your Places'),
actions: [
IconButton(
icon: const Icon(Icons.add),
onPressed: () {
Navigator.of(context).push(
MaterialPageRoute(
builder: (ctx) => const AddPlaceScreen(),
),
);
},
),
],
),
body: const PlacesList(
places: [],
),
);
}
}
1) 앱바 상단에 addplaceScreen으로 이동되는 버튼 추가
2) 바디에는 별도 placesList위젯 연동
- screens/add_place.dart
import 'package:flutter/material.dart';
class AddPlaceScreen extends StatefulWidget {
const AddPlaceScreen({super.key});
@override
State<AddPlaceScreen> createState() {
return _AddPlaceScreenState();
}
}
class _AddPlaceScreenState extends State<AddPlaceScreen> {
final _titleController = TextEditingController();
@override
void dispose() {
_titleController.dispose();
super.dispose();
}
@override
Widget build(BuildContext context) {
return Scaffold(
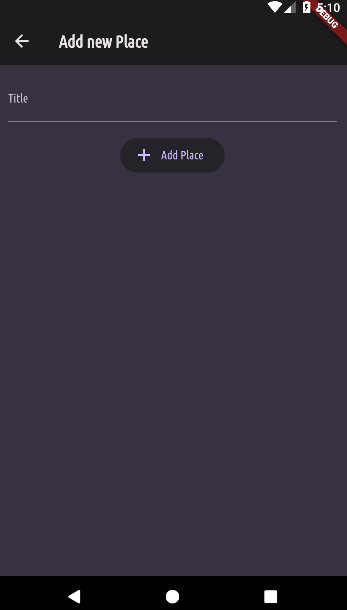
appBar: AppBar(
title: const Text('Add new Place'),
),
body: SingleChildScrollView(
padding: const EdgeInsets.all(12),
child: Column(
children: [
TextField(
decoration: const InputDecoration(labelText: 'Title'),
controller: _titleController,
style: TextStyle(
color: Theme.of(context).colorScheme.onBackground,
),
),
const SizedBox(height: 16),
ElevatedButton.icon(
onPressed: () {},
icon: const Icon(Icons.add),
label: const Text('Add Place'),
),
],
),
),
);
}
}
1) 텍스트 폼은 여러방법으로 사용할 수 있다. 간단한 경우에는 위와 같이 사용해보자.별도 컨트롤생성(컨트롤러 생성시에는 dispose부분 꼭 추가)
2) label : Text()~~ 해도 되는데, labelText로 하면 한번에 문자를 입력할 수도 있다.
- widgets/places_list.dart
import 'package:favorite_places/models/place.dart';
import 'package:flutter/material.dart';
class PlacesList extends StatelessWidget {
const PlacesList({super.key, required this.places});
final List<Place> places;
@override
Widget build(BuildContext context) {
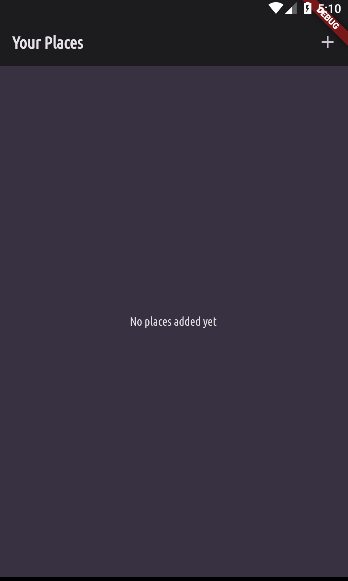
if (places.isEmpty) {
return Center(
child: Text(
'No places added yet',
style: Theme.of(context).textTheme.bodyLarge!.copyWith(
color: Theme.of(context).colorScheme.onBackground,
),
),
);
}
return ListView.builder(
itemCount: places.length,
itemBuilder: (ctx, index) => ListTile(
title: Text(
places[index].title,
style: Theme.of(context).textTheme.titleMedium!.copyWith(
color: Theme.of(context).colorScheme.onBackground,
),
),
),
);
}
}
1) 리스트뷰로 보여줄 예정
- 결과 화면
'코딩강의 > favorite_places(플러터-유데미)' 카테고리의 다른 글
| ~250. Displaying a Location Preview Map Snapshot via Google (0) | 2023.11.20 |
|---|---|
| ~244. Previewing the Picked Image (0) | 2023.11.19 |
| ~242. Using the Device Camera For Taking Pictures (0) | 2023.11.19 |
| 239. Adding a "Place Details" Screen (Challenge Solution 6/6) (0) | 2023.11.16 |
| ~238. Adding Places with Provider & Displaying Places (Challenge Solution 5/6) (0) | 2023.11.16 |

